Overview
An API key provides authenticated access to platform services. Define its name, description, expiration, and access permissions within the Dev Hub to control how your applications interact with Baasi.
API Key Creation
Enter API Key Details
Provide a unique name for your API key to identify its function. Add a description to explain the API key's intended use. This clarifies its purpose within your Baasi integrations.
Set Key Validity
Specify the duration for which the API key remains active. Select the unit of time (days, months, or years) from the accompanying dropdown menu. This ensures your API key is active for a specific duration, enhancing security by limiting its lifespan.
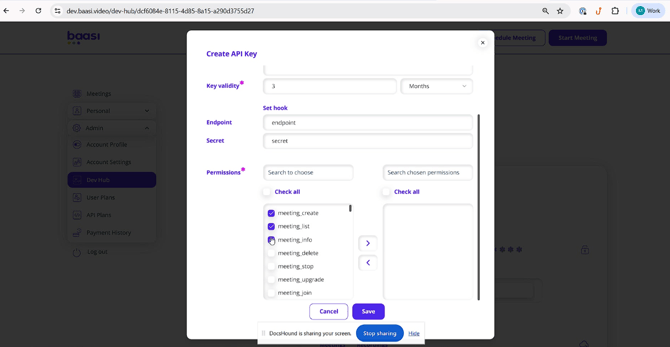
Define Endpoint and Secret
Configure the webhook for your API key by entering the URL where Baasi sends webhook notifications in the "Endpoint" field. Provide a secret key in the "Secret" field to establish the communication channel and security token. This allows Baasi to send notifications or data to your specified endpoint, and the secret verifies the authenticity of incoming webhook requests.
Assign Permissions
Grant specific access rights to your API key by selecting the permissions you want to assign. Search for permissions or browse available options. Choose permissions like "meeting_create" and "meeting_list" to allow the API key to create and list meetings. This determines which Baasi functionalities and data your API key interacts with, ensuring it has only the necessary privileges for its intended use.
Save API Key
Finalize the creation of your API key by clicking the "Save" button. This activates your newly configured API key, making it ready for use with your integrations and applying all specified details, validity, endpoint, secret, and permissions.